Mastering Your First Charcuterie Board: A Beginner's Guide
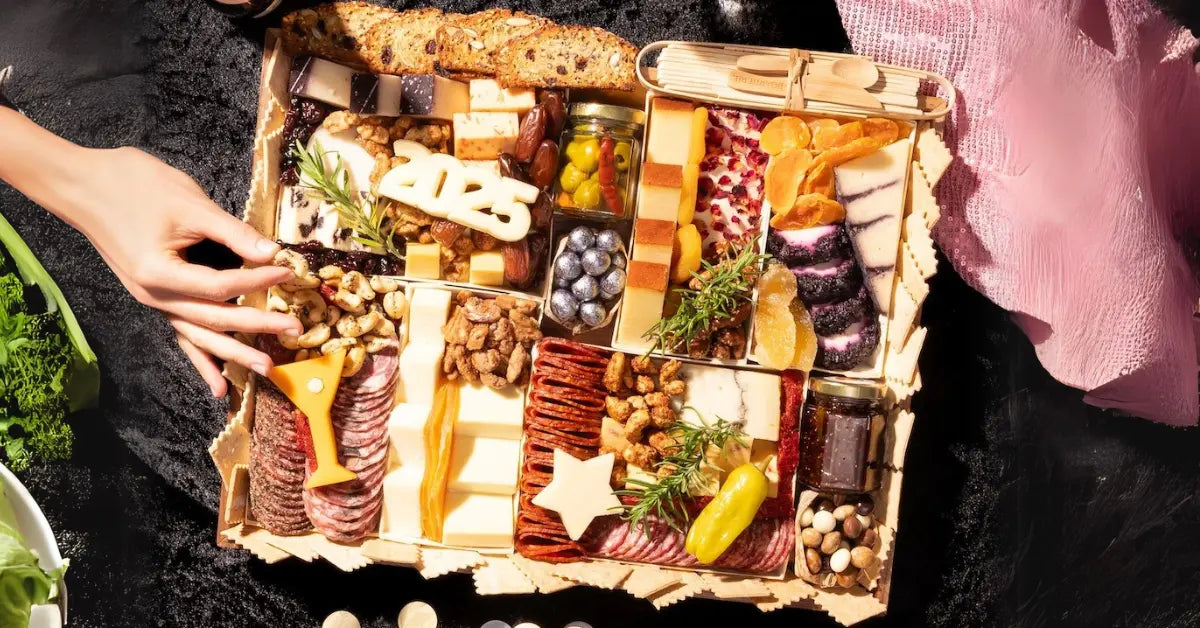
Imagine a stunning spread of vibrant colors, enticing textures, and an irresistible array of flavors, all artfully arranged on a single platter. This, my friends, is the magic of a
charcuterie board. Once seen as an intimidating gourmet endeavor, creating a charcuterie board has become a beloved way to entertain, celebrate, and simply enjoy delicious food with friends and family. If you've ever admired these edible masterpieces and wished you could create your own, you're in the right place. This comprehensive guide will equip you with all the tips, tricks, and inspiration you need to build your very first charcuterie board with confidence and flair.
What Exactly *Is* a Charcuterie Board?
Let's start with the basics. Pronounced "shahr-koo-tuh-ree," the term charcuterie originally referred to a French style of cooking devoted to prepared meat products, primarily from pork. Think sausages, pâtés, hams, and terrines. Today, however, the concept has beautifully evolved. While cured meats remain a star attraction, a modern charcuterie board is much more than just meat. It's a "moveable feast" – a curated collection of meats, cheeses, crackers, breads, fruits, nuts, olives, spreads, and often sweet treats, all designed to offer a delightful sensory experience.
The beauty of a charcuterie board lies in its versatility and visual appeal. It's a conversation starter, a centerpiece, and an interactive dining experience all rolled into one. And the best part? You don't need to be a professional chef to make a show-stopping one. With a little guidance, you can transform a simple serving platter into an edible work of art that will be the talk of your next gathering. Whether you opt for a grand centerpiece or charming mini-boards for individual servings, the possibilities are endless.
Building Blocks: Essential Ingredients for Your Charcuterie Board
The secret to a successful charcuterie board is variety – a harmonious blend of flavors, textures, and colors. Think about offering contrasts: salty with sweet, creamy with crunchy, tangy with mild. Here's a breakdown of the key categories to consider for your beginner's board:
*
Meats: The Foundation
* Choose 2-3 types of pre-sliced, easy-to-eat cured meats.
*
Variety is key: Aim for different textures and flavor profiles. Think a robust Genoa salami (often folded or rolled), delicate prosciutto (beautifully draped or curled), and perhaps a smoky speck or peppery soppressata. Thin slices of ham or pancetta can also be excellent additions.
*
Tip: Arrange meats in appealing ways – roll salami into tubes, create "roses" with prosciutto, or simply artfully pile them.
*
Cheeses: The Creamy & Crumbly Companions
* Select 2-3 cheeses that offer a range of textures and flavors.
*
Hard Cheeses: A sharp cheddar, aged Gouda, or a nutty Parmesan block (with a small knife for crumbling) provides structure and bold flavor.
*
Soft/Semi-Soft Cheeses: A creamy brie or camembert (served at room temperature for optimal spreadability), a tangy goat cheese log, or even a luscious burrata (served with a drizzle of olive oil) adds richness.
*
Color Contrast: Look for a mix of white, yellow, and orange cheeses to add visual interest.
*
Tip: Cut some cheeses into cubes, leave others in wedges, or crumble some for variety. For a deeper dive into cheese selection and more, check out our guide on
Crafting the Perfect Charcuterie Board: Ingredients & Styling Tips.
*
Bread & Crackers: The Vehicles for Flavor
* Offer a selection that provides different crunch levels and pairing potentials.
*
Crunchy: Water crackers, seeded grain crackers, or artisanal crisps are perfect for soft cheeses and spreads.
*
Chewy/Soft: Thin slices of toasted baguette (crostini), mini pita breads, or even a crusty sourdough offer substance.
*
Tip: Consider gluten-free options if you have guests with dietary restrictions.
*
Fresh Fruit: Sweetness & Brightness
* Fresh fruits add vibrant color, a refreshing palate cleanser, and natural sweetness.
*
Grapes: Always a classic, either red or green.
*
Berries: Strawberries, raspberries, and blueberries add pops of color and juicy sweetness.
*
Sliced Fruits: Thin slices of apples or pears (tossed lightly with lemon juice to prevent browning) pair beautifully with cheese.
*
Dried Fruit & Nuts: Texture & Earthiness
* These add texture, concentrated sweetness, and a hearty element.
*
Dried Fruits: Apricots, figs, dates, or cranberries offer a chewy sweetness.
*
Nuts: Shelled, salted nuts like almonds, cashews, pistachios, or candied walnuts provide crunch and a savory note.
*
Pickles, Olives & Dips: Tangy & Savory Accents
* These elements are crucial for cutting through the richness of meats and cheeses.
*
Pickled Vegetables: Cornichons (mini dill pickles), pickled onions, or even banana peppers add a delightful tang.
*
Olives: A mix of black, green, and Kalamata olives provides briny depth.
*
Dips/Spreads: Small bowls of fig jam, pepper jelly, whole grain mustard, hummus, or a savory tapenade elevate the flavor profile.
*
Sweet Endings: A Touch of Indulgence
* Satisfy sweet cravings with a small addition.
*
Chocolate: Dark chocolate squares, chocolate-covered almonds, or mini truffles.
*
Honey: A small pot of honey or a honeycomb piece is excellent for drizzling over cheese.
*
Garnish: The Finishing Touch
* Fresh sprigs of rosemary or thyme not only look beautiful but also add an aromatic quality. Edible flowers can also be a lovely touch.
Designing Your Edible Masterpiece: Tips for Arrangement
Once you have your ingredients, the fun truly begins: arrangement! Think of your board as a canvas. The goal is an abundant, inviting display that encourages guests to dig in.
1.
Choose Your Board: Any sturdy surface works – a large wooden cutting board, a slate slab, or even a large platter. Don't be afraid to think outside the box; you can even fill small cups for individual servings.
2.
Start with Your Anchors: Place any small bowls for dips, olives, or nuts first. These create structure and help you build around them. Also, position any larger blocks or wedges of cheese.
3.
Arrange Meats & Cheeses: Artfully place your meats, folding or rolling them to add height and texture. Distribute your cheeses around the board, ensuring different types are accessible. For more detailed styling techniques, see our guide on
DIY Charcuterie Board: Simple Steps for Stunning Party Platters.
4.
Add Bread & Crackers: Fan them out, stack them, or arrange them in lines. Place them strategically near cheeses and spreads.
5.
Fill in with Fruits & Nuts: Tuck fresh grapes into empty spaces, scatter berries, and pile nuts into small clusters. This is where you bring in bursts of color and freshness.
6.
Incorporate Pickles & Spreads: Fill your small bowls with cornichons, olives, and various jams or mustards.
7.
The Finishing Touches: Sprinkle fresh herbs like rosemary or thyme throughout the board. This instantly elevates the presentation and adds a beautiful, fresh scent. Don't be afraid to pile ingredients high – an abundant board looks much more inviting than a sparse one.
Quantities, Serving, and Special Touches
Planning for the right amount of food is crucial for a successful gathering. A good rule of thumb for a starter charcuterie board, especially if it's an appetizer, is to estimate:
*
Meats: Approximately 3-4 slices per person.
*
Cheeses: About 1-2 ounces (30-60g) per person.
*
Crackers/Bread: Plenty for scooping and spreading.
* Everything else, like fruits, nuts, and olives, can be a bit more generous to fill out the board. If the charcuterie board is the main event, you'll want to increase these quantities.
Serving Tips:
* Take cheeses out of the refrigerator about 30 minutes before serving to allow them to come to room temperature. This enhances their flavor and texture.
* Provide small serving utensils for dips, cheeses, and olives to keep things hygienic.
* Ensure there's enough space for guests to comfortably reach different items.
Special Touches:
Consider creating mini charcuterie boards as charming party favors or hostess gifts. Simply arrange a small selection of items on a mini board, wrap it in plastic wrap, and tie it with a festive bow. It's a delightful, personalized gesture that's sure to impress. Another fun idea is to use small cups for individual charcuterie "cups," perfect for mingling at larger gatherings.
Conclusion
Creating your first charcuterie board is a rewarding experience that combines culinary exploration with artistic expression. It's about more than just putting food on a platter; it's about crafting an experience, fostering connection, and celebrating the joy of sharing. Don't be intimidated – embrace the process, experiment with flavors, and let your inner foodie shine. With these tips and a little creativity, you're well on your way to mastering the art of the charcuterie board and delighting your guests with an unforgettable spread. So gather your ingredients, unleash your imagination, and get ready to enjoy your delicious edible masterpiece!